
How to Set up a Tent Step by Step 2023?
Setting up a tent sounds easy, but it’s not because improper setup will ruin your stay and push you towards extreme difficulties managing the tent all day. So you must know how to set up a tent step by step before you start your journey.
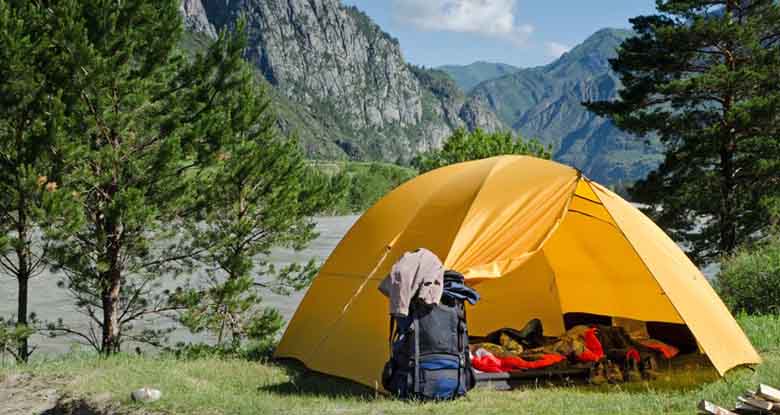
If you are going on an adventure trip with all your necessary belongings and plan to stay there for one or two or even more and need to set up a tent, don’t worry. The tent is like your temporary shelter out of your home, so you need to make it comfortable and well put.
Tins to Consider before Setting up Tent:
Remember, the tent body protects you from weather issues like solid winds, rainfall, and other outdoor drawbacks, so a perfectly pitched tent will keep you away from all difficulties. If you are confused about the procedure of setting a tent perfectly, we are here to show you how it’s done
Know your tent
You must know the type of tent you are carrying before you start pitching. Tens have different mechanisms, so it’s crucial to understand what you are dealing with.
Suppose you use a modern tent that uses poles to form the dome-like structure with a large compartment module inside and comes with a protective flysheet to face bad weather. In that case, this particular article will help you understand the basics of putting up your tent.
Essential items to carry
Right out of the box, you should be getting the tent with poles, tarpaulin, flysheet and ground cover. Along with it, you must carry a hammer that fits your bag because you will be striking a few nails to bond your tent.
Carry a nail remover to disassemble the tent when you are done using it. Include sleeping bags, travel pillows, safety equipment like bug repellents, a first aid kit, lights, and other necessary items.
Where to assemble the tent?
Always make sure you are at the perfect spot, somewhere on the high ground applying your tent’s footprint to keep away from waterlogging. If you set up a tent in low-lying areas, you are likely to get hindered by ground problems.
The main aim is to keep away from floods and protect your tent from being sapped to the ground. Always keep your eyes open to your surroundings, stay away from places where animals might interfere.
Bugs and insects should also be taken into consideration. Other dangers like falling tree branches are another problem you might face. Well, most campers do, so be sure you are in a safe zone. Stay away from the wrong places. Always pick a hygienic place so that you don’t have to be dainty.
Now, moving on to how to set up a tent step by step.
Step 1: Apply the foundation
Your first and foremost task is to keep your tent’s base protected so that no groundwater invades your living space. Lay down the groundsheet. This is the ultimate barrier that will keep water away from your tent.
Also known as Tarp, the tarpaulin fabric makes a barrier between the ground surface and the base of your tent so that it doesn’t carry moisture from one surface to the other.
You don’t want to sleep on the bumps of the ground, do you? To flatten the surface, the foundation tarp plays a crucial role. A well-put tarp is an ideal way to start.
Step 2: Positioning the tent components on the ground tarp
You will have to start structuring the tent, starting by finding the tent base and placing its top the foundation you’ve set earlier.
The tent setup is no way near done, have patience, identify the rainfly, poles, and nails, separate them first, do keep in mind how many nails you are using so that it will be easier once you start unpacking it.
Step 3: Affixing the tent poles
Placing the poles just the right way up is crucial to giving your tent the overall structure. The tent poles are usually counted and colored to make things easier for you. You need to place it on point. Start connecting the tent poles, and you will see an outer structure forming.
Just place it on top of the flat surface. Start pushing the poles towards one another to lay a solid structure. Please make sure you attach it well. Just don’t pull it while you plan to build up a structure.
There are different types of pole systems on tents. Some need two poles for laying the grid. Some have flaps where you need to slide the poles through the flaps and attach them to the tent’s ground.
The flaps aid the tent to get into shape once the poles stretch out. Place the poles onto the right flaps, and in no time, you will see the tent standing strong. In some cases, you might have to place the outer flysheet before joining the inner tent poles. Adjust by bending the poles and clipping the inner body onto the poles.
Step 4: Time to raise the tent
This part needs your coordination more than anything. It’s better to seek help from your fellow campers if you are adjusting a large unit. If you are dealing with smaller tents, you can do it alone. Start raising your tent.
You will see the poles straighten and adjust into position. Next, you will see the overall structure appearing, and to make a defined structure out of it, pull the ends to tighten things up.
Step 5: Rooting the tent to the ground
The most important task you have to perform is to make sure the tent is well-grounded and doesn’t snap out in extreme weather. The tent should endure the wind and stand tall, protecting you from the outside.
You have to stake your tent. This will make sure the tent is well balanced and therefore supports the tent and the infrastructure. In this case, you have to use the stakes and nails to fix the tent to the ground.
Use some force from four sides so that the tent is fitted tightly. Apply the pegs strongly to the ground using a mallet or anything heavy like a rock. Make sure the stakes are at a 45-degree angle away from the grounded poles. Don’t push the pegs too deep into the ground. Keep some room so that you can attract anything over it if needed.
Step 6: Top it up with the rainfly
Placing the flysheet is as important as it can be. You don’t want to be attacked by storming weather. Put the rainfly over the tent, use the loops underneath the fly and attach it to the tent’s poles. Place the fly door fully aligned to the inner tent door. Just putting the fly is not the end of the task.
You have to stake the sides of the rainfly to keep it secure to your tent. Apply some force to the sides to stretch it out and create airspace between the tent and the rainfly for breathability and protection.
Step 7: Pitching up the tent
For extra protection, securing the tent with nearby trees or any solid base is recommended. Not all tents are freestanding, so you might eventually need a guyline to secure it. Even though you are using a structured pole frame, you must end your setup using a guyline for your safety.
You don’t know how nature plays along, so better be on the safe side. Guyline stretches the tent creating a pocket of airflow in between. Thus you get good ventilation throughout your stay. The main aim is to provide more steadiness to your tent in case of unwanted weather.
To secure the load, you must use a trucker’s hitch to strengthen the tension line, or else you might also use ropes, like bowline knots, to tighten things up at the pegging end. You must know where the guy-out points are. Guy-out points attach the guy lines and affixes the tent in a more stable position.
If you participate in all the steps mentioned above, you will be well able to set up your tent in no time and start camping!
Related Content
Conclusion
I’ve tried my best to give you a clear picture of how to set up a tent in steps. Indeed, not the easiest thing to do, but knowing how to set up a tent step by step is just as important as your camping routine.
You will need patience and effort to build a solid structure for your temporary home. Using your knowledge and senses, try to keep away from rain and other natural disasters like falling trees, landslides, etc.
Always look for stable ground and a safe zone for your camping. Like I already mentioned, setting up a tent is not easy as it looks. Still, if you follow proper instructions and perform all the necessary steps mentioned above, you will be having great fun and realize that setting up a tent is not that difficult.